Pickled Garlic: The Ultimate Tangy Delight for Your Dishes
Pickled garlic is a zesty explosion of flavor that transforms any meal into a culinary adventure! Imagine crisp, crunchy cloves soaked in a tangy brine of vinegar, sugar, and a hint of lemon juice, creating a delightful balance of sweet and sour. This vibrant condiment is perfect for jazzing up salads, sandwiches, or even as a bold snack on its own. With just a few simple ingredients and a little patience, you can create a jar of these irresistible bites that will have your taste buds dancing with joy!
Table of Contents
Why You’ll Love This Recipe
- Elevate your meals with a zesty kick that’s hard to resist.
- Enjoy the health benefits of garlic while savoring its tangy flavor.
- Perfectly versatile—add it to salads, sandwiches, or as a snack.
- Simple to make at home, ensuring freshness and quality.
- Impress your friends with a unique homemade condiment!
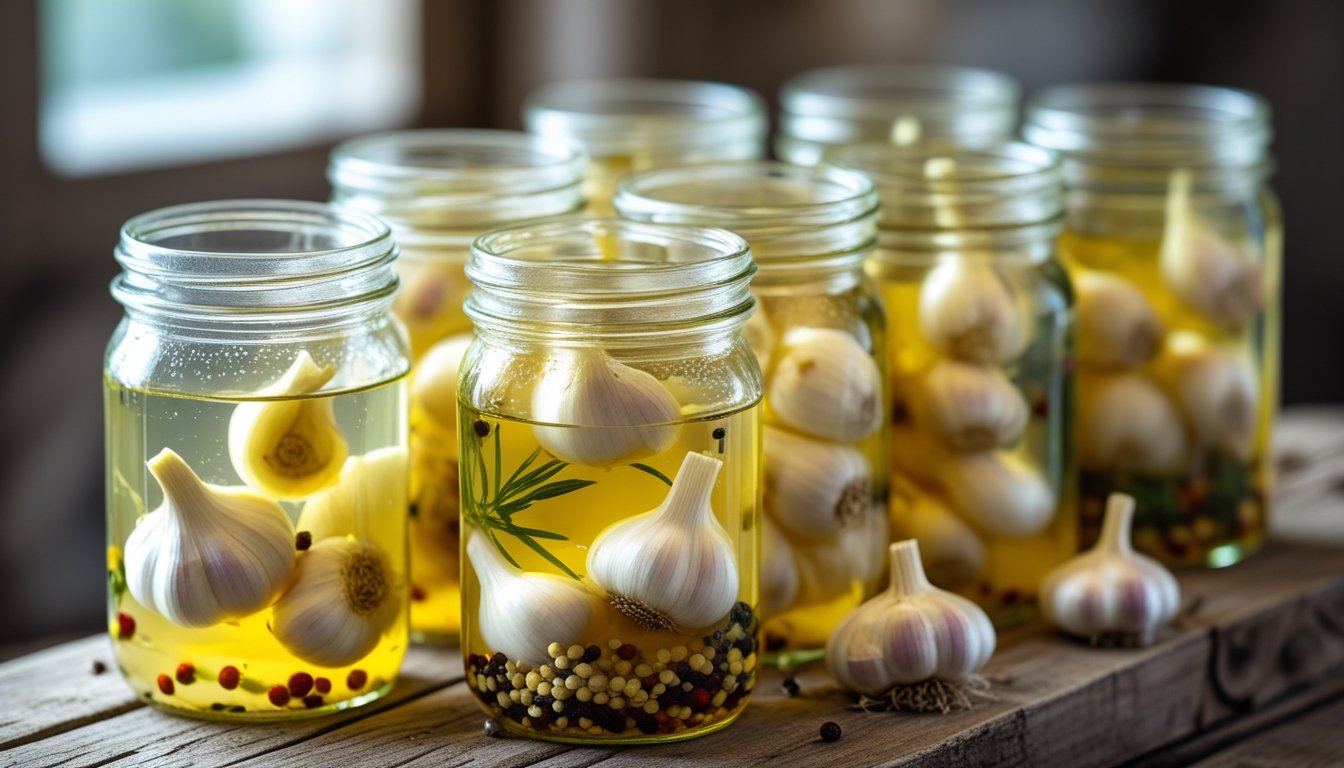
pickled garlic
Ingredients
Method
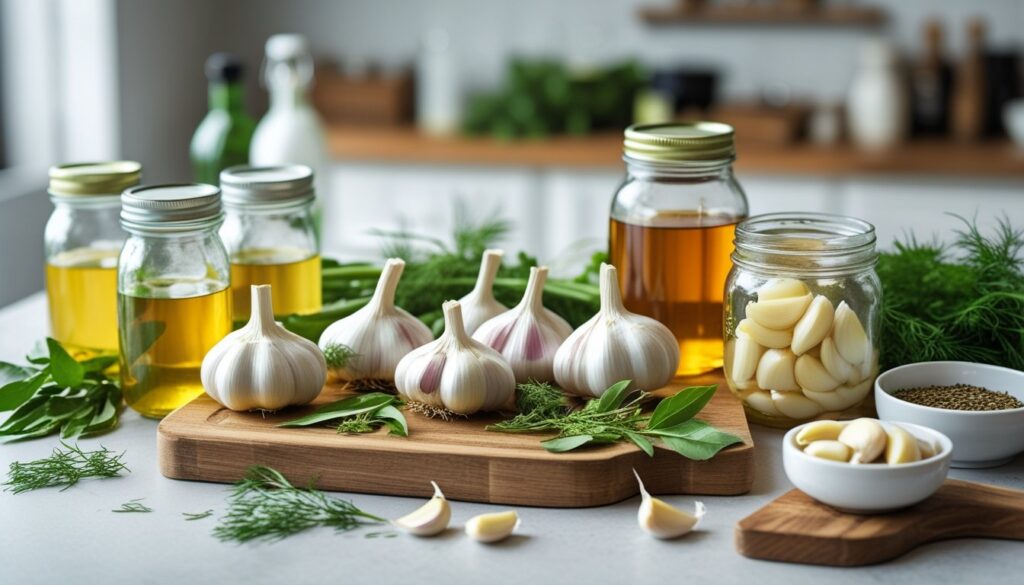
- Collect fresh garlic bulbs, vinegar (white or apple cider), water, salt, and sugar. Optional: add spices like peppercorns or dill for extra flavor!
- Peel the garlic cloves. You can use a knife or simply smash them lightly to make peeling easier. Aim for about 10-15 cloves.
- In a saucepan, combine equal parts vinegar and water. Add salt and sugar to taste. Heat until dissolved, then let it cool slightly.
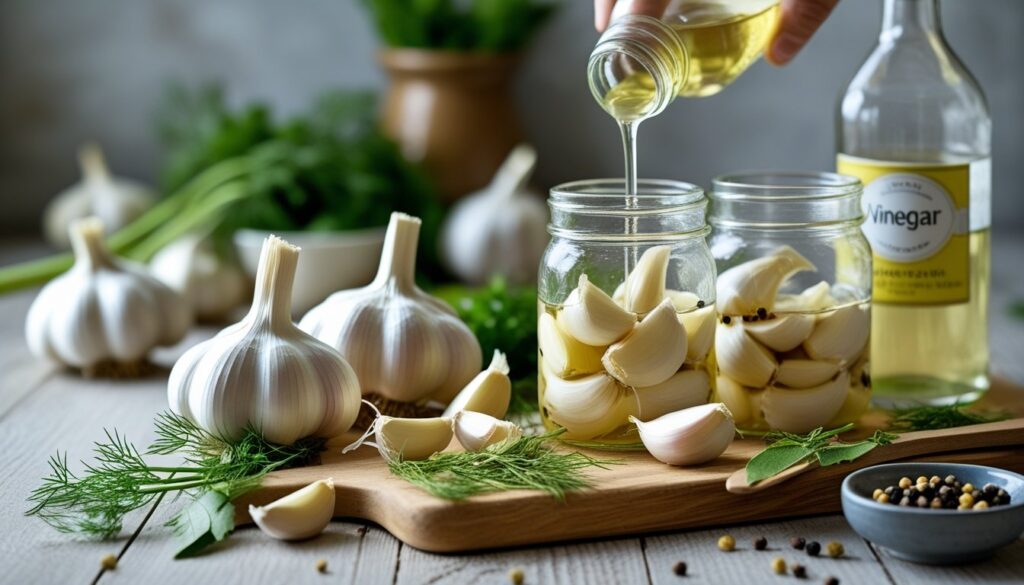
- Place the peeled garlic cloves into clean, sterilized jars. If using, add your chosen spices for that extra zing!
- Carefully pour the warm brine over the garlic cloves, ensuring they are fully submerged. Leave a little space at the top of the jar.
- Seal the jars tightly with lids. Let them cool to room temperature before refrigerating. Your pickled garlic is now ready to chill!
- Allow the garlic to pickle for at least 24 hours before tasting. The longer you wait, the tangier it gets. Enjoy your pickled garlic in salads, sandwiches, or straight from the jar!
Recipe Snapshot
| Feature | Details |
|---|---|
| Category: | Condiment |
| Cuisine: | Global |
| Prep Time: | 15 minutes |
| Cook Time: | 0 minutes |
| Total Time: | 1 week (for pickling) |
| Dietary: | Vegan, Gluten-Free |
| Serves: | 1 jar |
| Best Served: | As a side, in salads, or on sandwiches |
Ingredients
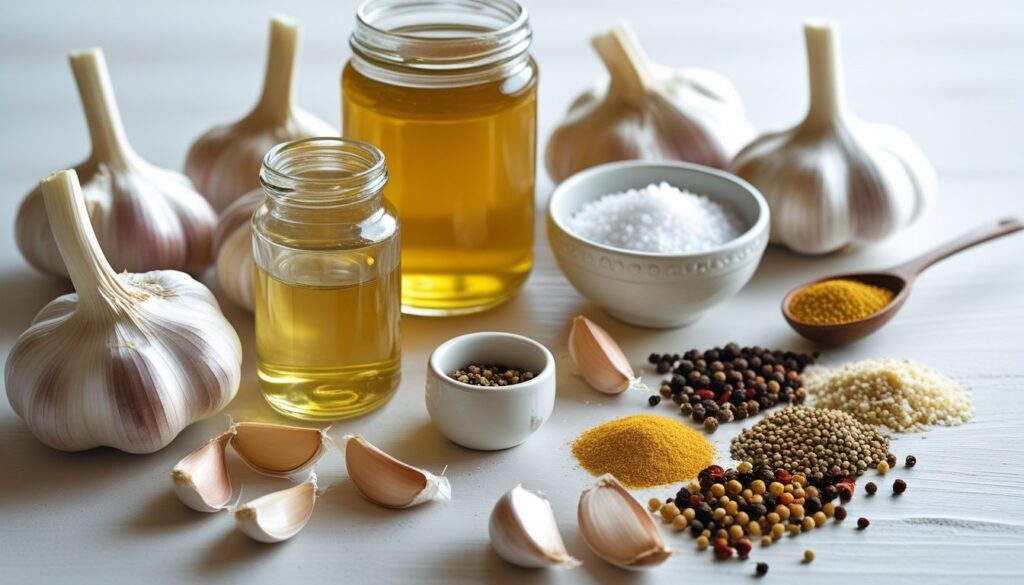
- Garlic – The star of the show, providing that bold flavor.
- Vinegar – Adds the tangy kick essential for pickling.
- Water – Balances the acidity of the vinegar.
- Sugar – A touch of sweetness to enhance the garlic’s flavor.
- Salt – Essential for preservation and flavor enhancement.
- Spices – Customize with your favorites like peppercorns or bay leaves for added depth.
- Herbs – Fresh dill or thyme can elevate the flavor profile.
Ingredients with measurements will be right under the article in the recipe card.
How to Make the Recipe
Get ready to embark on a tangy adventure with pickled garlic! Follow these easy steps to create your own delightful batch.
Step 1: Gather Your Ingredients
Collect fresh garlic bulbs, vinegar (white or apple cider), water, salt, and sugar. Optional: add spices like peppercorns or dill for extra flavor!
Step 2: Prepare the Garlic
Peel the garlic cloves. You can use a knife or simply smash them lightly to make peeling easier. Aim for about 10-15 cloves.
Step 3: Make the Brine
In a saucepan, combine equal parts vinegar and water. Add salt and sugar to taste. Heat until dissolved, then let it cool slightly.
Step 4: Pack the Jars
Place the peeled garlic cloves into clean, sterilized jars. If using, add your chosen spices for that extra zing!
Step 5: Pour the Brine
Carefully pour the warm brine over the garlic cloves, ensuring they are fully submerged. Leave a little space at the top of the jar.
Step 6: Seal and Store
Seal the jars tightly with lids. Let them cool to room temperature before refrigerating. Your pickled garlic is now ready to chill!
Step 7: Wait and Enjoy
Allow the garlic to pickle for at least 24 hours before tasting. The longer you wait, the tangier it gets. Enjoy your pickled garlic in salads, sandwiches, or straight from the jar!
Pro Tips for Making the Recipe
• Use fresh, firm garlic bulbs for the best flavor and crunch.
• Experiment with different vinegars like apple cider or rice vinegar for unique tastes.
• Add a pinch of sugar to balance the tanginess and enhance the flavor.
• Let the garlic sit for at least a week before tasting for optimal flavor development.
• Store in a cool, dark place to maintain freshness and flavor.
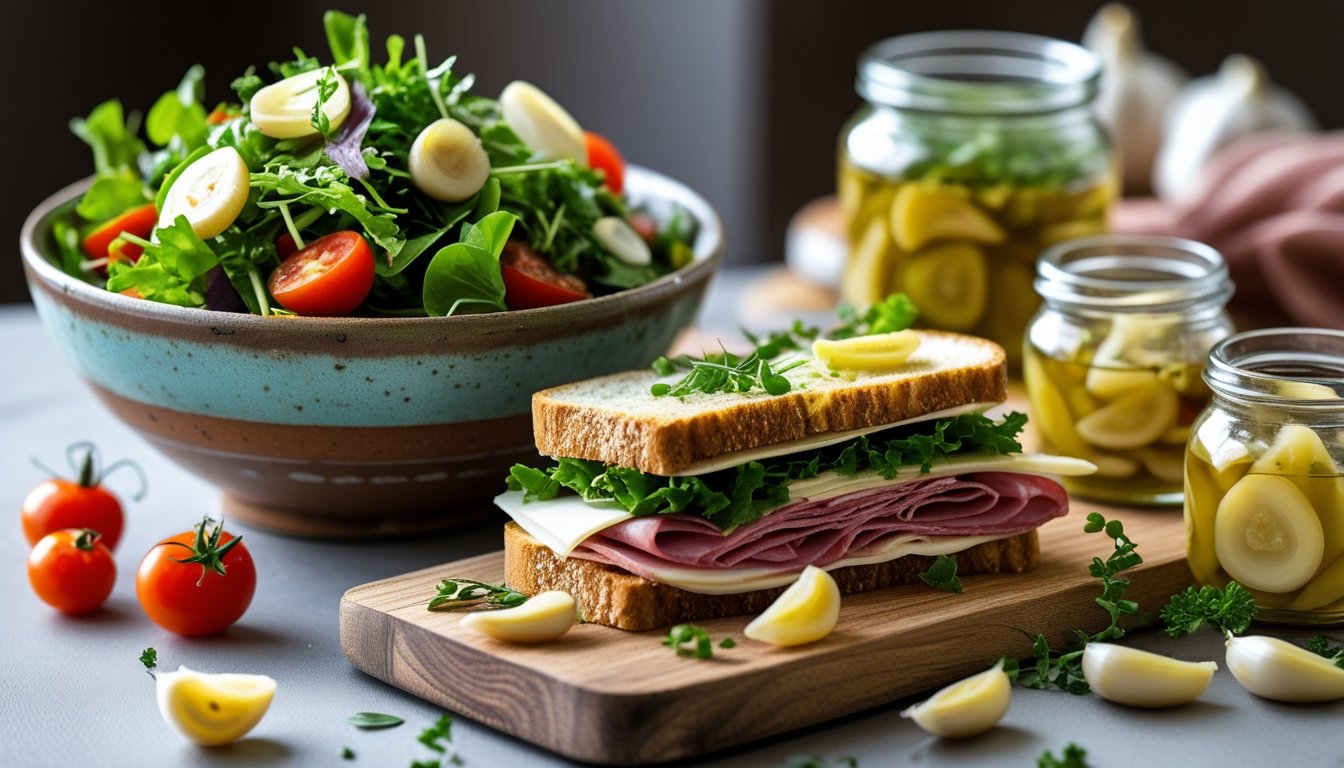
How to Serve

- Add pickled garlic to your favorite salads for a zesty kick.
- Top off sandwiches and burgers with a few cloves for extra flavor.
- Mix into pasta dishes for a tangy twist.
- Serve as a crunchy side with grilled vegetables.
- Incorporate into hummus or dips for a unique taste.
- Pair with cheese platters for a delightful contrast.
- Use as a garnish for soups to enhance the flavor profile.
- Blend into dressings for a bold, garlicky punch.
- Enjoy as a snack straight from the jar for a quick bite.
- Combine with olives for a savory appetizer mix.
Make Ahead and Storage
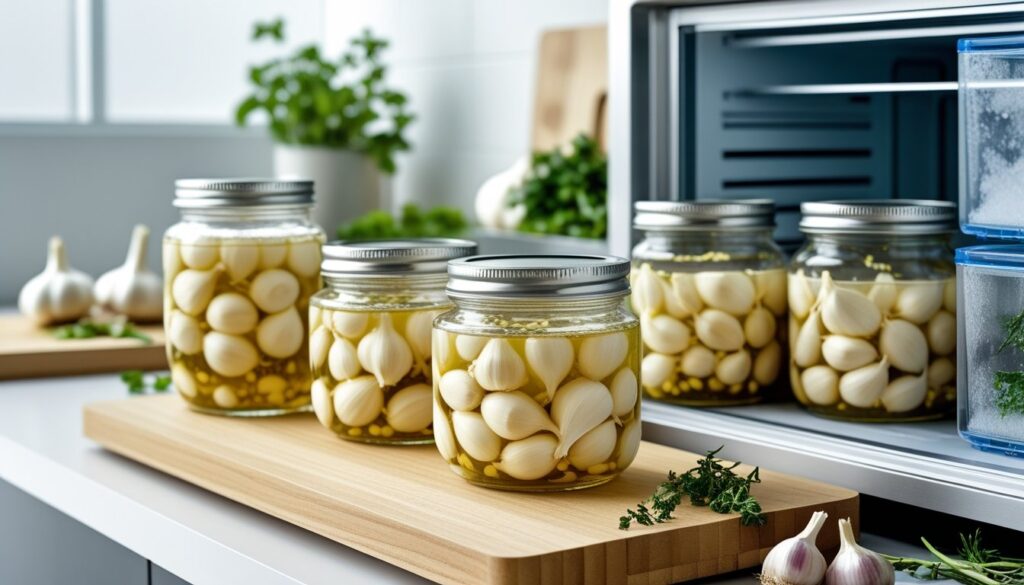
Storing Leftovers
• Allow pickled garlic to cool completely before storing.
• Transfer to an airtight container.
• Store in the refrigerator for up to 2 months.
• Keep away from direct sunlight and heat sources.
Freezing
• Place pickled garlic in a freezer-safe container.
• Leave some space at the top for expansion.
• Label with the date and contents.
• Freeze for up to 6 months for best quality.
Reheating
• Thaw in the refrigerator overnight before reheating.
• Use a microwave on low power for quick reheating.
• Alternatively, warm gently in a pan over low heat.
• Avoid overheating to maintain texture and flavor.
FAQs
What is the best way to store pickled garlic?
Store pickled garlic in a sealed jar in the refrigerator. It can last for several months, but the flavor is best within the first few weeks. Always use clean utensils to avoid contamination.
Can I use different types of vinegar for pickling garlic?
Absolutely! While white vinegar is common, you can experiment with apple cider vinegar or rice vinegar for a unique flavor. Each type will give your pickled garlic a distinct taste.
How can I use pickled garlic in my cooking?
Pickled garlic adds a tangy kick to salads, sandwiches, and charcuterie boards. You can also chop it up and mix it into dressings or dips for an extra flavor boost.
Is pickled garlic safe for everyone to eat?
Generally, pickled garlic is safe for most people. However, those with certain dietary restrictions or allergies should check the ingredients used in the pickling process. Always consult with a healthcare provider if unsure.
Final Thoughts
So there you have it—pickled garlic, a tangy delight that’s as easy to make as it is to enjoy! Picture those vibrant jars lining your kitchen, ready to elevate your meals with a burst of flavor. Whether you’re adding them to salads, sandwiches, or just snacking straight from the jar, each bite is a little celebration. Dive in and relish the simplicity and joy of homemade pickled garlic!
Hungry for more delicious creations? Browse our site for more recipes and endless inspiration to spark your next culinary adventure!